Popular Mechanics - Shop, Reborn
REMAKING A CLUTTERED WORK AREA INTO A SHOWPIECE WITH DIAMOND-PLATE PEGBOARD, A HEAVY-DUTY WORKBENCH AND ROLLING TOOL STORAGE.
By Joseph Truini
When I first set up my basement workshop nearly 15 years ago, I didn’t have much time or money to invest, so I just banged together a 2 x 4 – and – plywood workbench and mounted a sheet of perforated pegboard to the wall.
This rudimentary layout served me well over the years. The workbench provided a large surface on which to build projects and fix furniture, and the pegboard kept dozens of hand tools neatly organized and readily accessible.
Eventually, though, the system became overloaded. The workbench got buried under an impenetrable pile of old tools, half-done projects and stacks of lumber. The pegboard ran out of space for any more hooks, and it strained under the weight of my ever-growing tool collection. It was clear that my shop needed a facelift. But rather than just tidying up the tools and clearing off the workbench, I decided to strip the entire space down to the bare floor and walls and start from scratch.
My primary goal was to create a better-organized workspace, but I also wanted it to look great. So I built itout of
materials not ordinarily found in a home shop,including fat black iron pipe, rock-hard maple butcher block and polishedaluminum diamond-plate pegboard. I couldn’t be happier with the results.
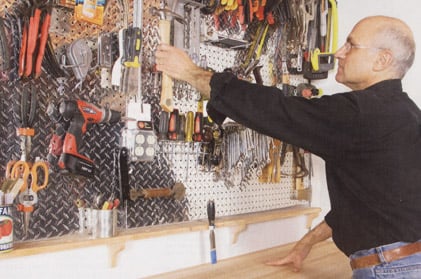
Installing the Pegboard
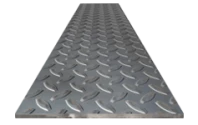
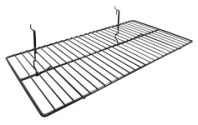
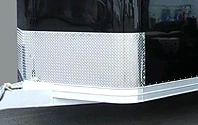
At first glance, it may seem that commercial-quality diamond-plate pegboard is just too extravagant for residential use. Maybe. But my old pegboard sagged, and hooks came loose as the holes elongated. The diamond plate will easily stand up to the rigors of an active workshop. Besides, it’s just plain cool – an important performance characteristic in my book.
True, this stuff is several times more expensive than the pegboard I replaced, but it’s about in line with other top-quality building materials. I paid $135, plus shipping, for two panels that measure 45 ½ in. on each side (diamondlifegear.com).
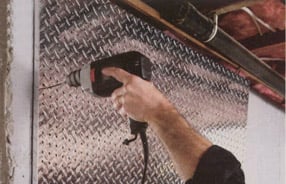
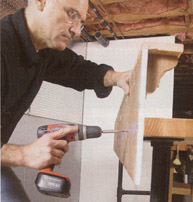
I was able to install the pegboard in minutes. In my case, the panels needed to be fastened to a concrete-block wall, but studs would work just as well. I used a hammer drill and a 5/32 in. carbide-tip masonry drill to bore the required holes through the panel and into the masonry (1). The panels come with small peel-and-stick plastic spacers that maintain the proper distance from the wall in order for the home owner to insert hooks (2).
With mounting holes bored and spacers applied, all that remained was to drive the fasteners home. I used 3/16 x 2 ¼ in. Tapcon masonry screws and turned them in with an ordinary cordless drill driver (3) no heavy equipment necessary. If you’ve never used these unique fasteners, you owe it to yourself to try them (tapcon.com). They can even be removed and repositioned easily.
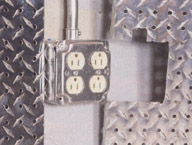
About the only tricky thing that you may have to do is cut the pegboard to fit around outlet boxes (4). I used a jigsaw and a high-speed steel blade with teeth shaped to cut aluminum. The simplest way to make these openings is to saw a U shape and then cut out the corners.
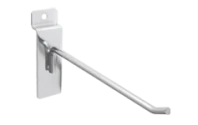
Building PegBoard - Step 1
The pegboard forms its own guide for boring into the substrate. Simply drill through peg holes to fasten the board. Use a carbide-tip masonry bit and hammer drill to bore into concrete block or solid concrete. Use an ordinary wood-boring bit and drywall screws to attach to drywall and wood framing.
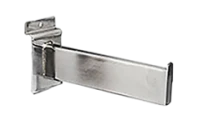
Building PegBoard - Step 2
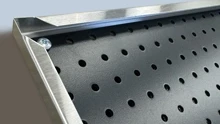
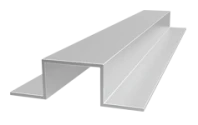
A PegBoard MX panel is tray-shaped. It has a cavity behind it to allow space for the hooked tool holders that fit through the peg holes. To ensure a consistent cavity behind each panel, it comes with a package of peel-and-stick spacers that should be attached to the panel’s back before it’s installed.

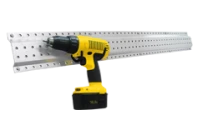
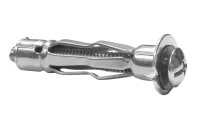
Building PegBoard - Step 3
With pilot holes bored and spacers installed, drive attachment screws into substrate. Use masonry screws such as Tapcons to install the panels to concrete block or solid concrete. Use drywall screws for drywall and wood framing.

Building PegBoard - Step 4
Cut the pegboard around any surface-mounted electrical boxes. If you’re installing the pegboard over existing surface-mounted electrical boxes, switches or plastic-covered cable, replace them with metal conduit and boxes. Conduit and metal boxes provide maximum protection to electrical wiring and devices located in work areas.
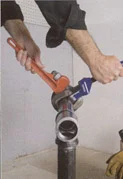
Building PegBoard - Step 5
After pipe fittings are painted, spin the parts together by hand, and then tighten them up with a pair of pipe wrenches turned in opposite directions.
Building PegBoard - Step 6
Use floor flanges on the threaded vertical sections of the leg assembly to form the foot at the base and the attachment point for the bench top. Turn the flange onto the vertical sections, stopping only once the threaded portion of pipe is fully engaged in the flange and is snug

Building PegBoard - Step 7
The H-shaped lag assembly is fastened to the bench top by driving screws through the attachment holes in the rim of the floor flange. Use a 5/32 in. bit and bore 1 in. deep pilot holes into the top. Then drive in 1 ¼ in No. 12 wood screws.

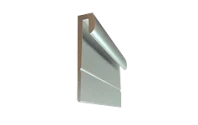
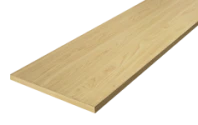
Building PegBoard - Step 8
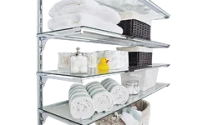
A fir plywood backsplash/tool shelf improves the usefulness of the bench. This is nothing more than an L-shaped assembly with decorative sawn brackets. Once the shelf is assembled, bore 5/32 in dia pilot holes through it and into the bench top. Next, fasten the shelf to the top with 1 5/8 in. drywall screws.
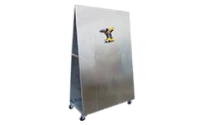
Building PegBoard - Step 9
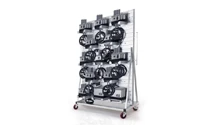
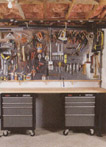
The crowning touch of the new work area is serious tool storage. Two rolling Craftsman tool chests (model 59299) are stationed beneath the bench; each has a 600-pound capacity.
Building the Workbench
I like the old-fashioned, robust look of 1 ½ in. threaded steel pipe. Years ago, you had to cut and thread such pipe yourself, but these days, local home centers will do the work for you. That made it an easy material for building the legs of my workbench – one that gave me both a solid frame and a distinctive look.
Working with precut threaded pipe is very simple and convenient. I put together two assemblies, each one shaped like an H and made of five straight lengths joined by a pair of T fittings. Four floor flanges are threaded onto the top and bottom of the vertical legs of each H. Each flange is nothing more than a disc of metal with a large threaded hole in its center and smaller unthreaded holes drilled through its circumference.
To dress up the pipe, I individually spray-painted each part with a glossy black paint that has a hammered texture. Before applying the paint, I wiped down the steel with a clean rag moistened with mineral spirits and covered the threads with masking tape. Keeping the threads bare of paint enabled me to turn the vertical parts of the H in and out during the assembly, so I could fine-tune the components and make sure everything was the same height – an especially important consideration on a wavy concrete basement floor.
From there, I simple had to remove the tape, turn the pieces together by hand and snug them up with a pair of pipe wrenches (5). Then I spun on each floor flange (6). To install the leg assembly, I flipped the top over and used a drill driver to bore pilot holes and drive hefty wood screws through the flange holes and into the top (7). A word of advice if you do this project: Don’t undersize the pilot holes. The laminated maple top is very tough, and it doesn’t take screws easily. Once the top was installed, I built the tool-hanging backsplash/shelf and screwed it to the top’s back edge (8). When everything was done, I rolled two craftsman tool cabinets into place (9) and put my tools away – in there sleek new home.